My first application
| Site: | eAcademy Preprod |
| Cours: | OpenShift v3 |
| Livre: | My first application |
| Imprimé par: | Visiteur anonyme |
| Date: | mercredi 17 décembre 2025, 01:40 |
Description
This book help you to create your first jboss application with JDSS tooling.
1. Install your machine
Before starting the exercise, you must install your machine.
eJDSS recommended to use JBoss Developer Studio distribution to develop projects for Openshift because this IDE distribution contains Eclipse plugins for Docker interaction. JBoss Developer Studio's installation and user guides are available here.
You must run your JBoss in an image docker. You must install Docker At Smals. Follow the installation instructions from the java web site.
2. Create an application
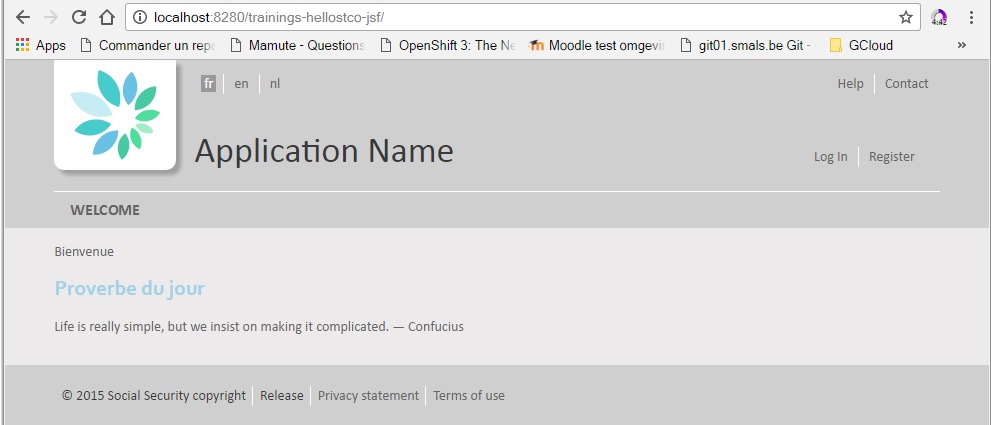
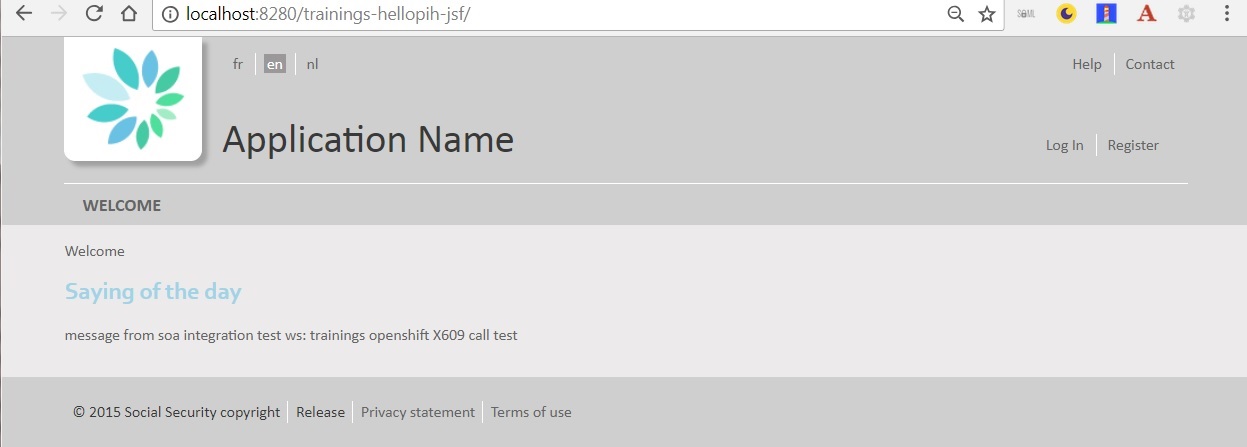
You create an application with one page and this page shows a hello world message.
2.1. Install Create Wizard
Install the “Smals Project Creation Wizard” plugin from the JDSS update site.
In the menu Help > Install New Software…, select the Smals update site (or create it if it doesn’t exist). Url is Smals - http://albanil00.smals.be/updatesite/neon.
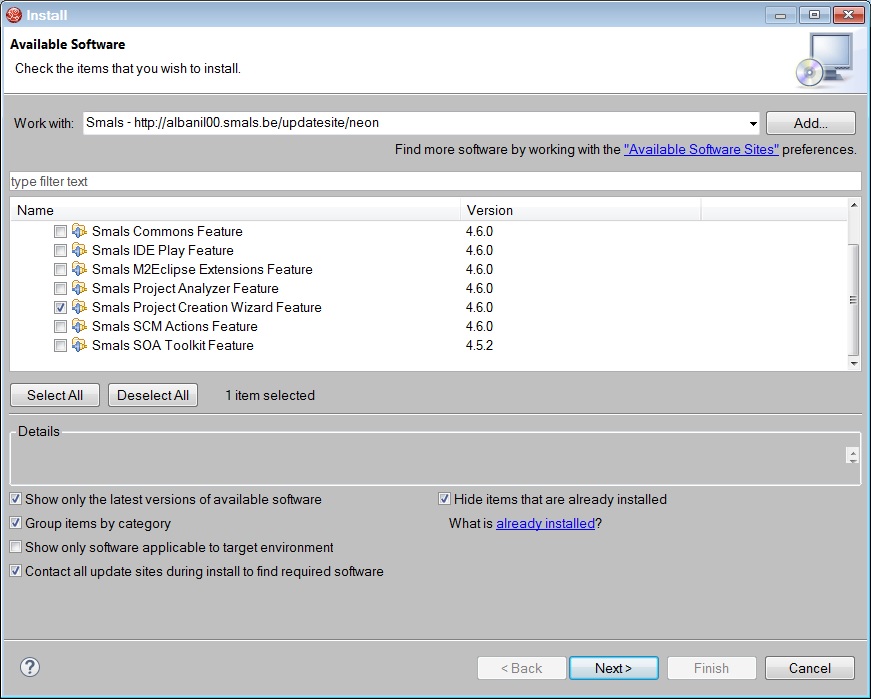
Select the Smals Project Creation Wizard plugin and follow the wizard.
You will need to restart JBDS at the end of the installation.
2.2. Create a project
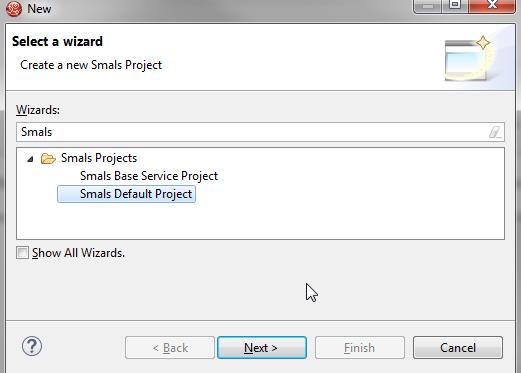
In
the menu File
> New > Other…,
select Smals Projects > Smals
Default Project
and click on Next.
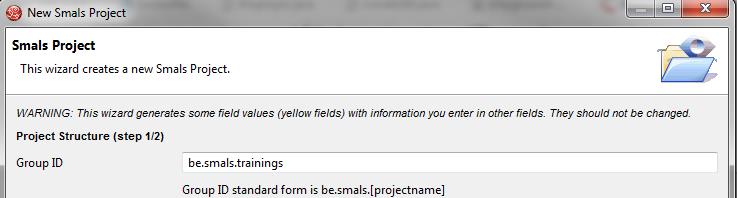
Enter the Group ID be.smals.trainings and click on Next.
Add
a master component helloXX
where XX is your userId. Then, add a web component.
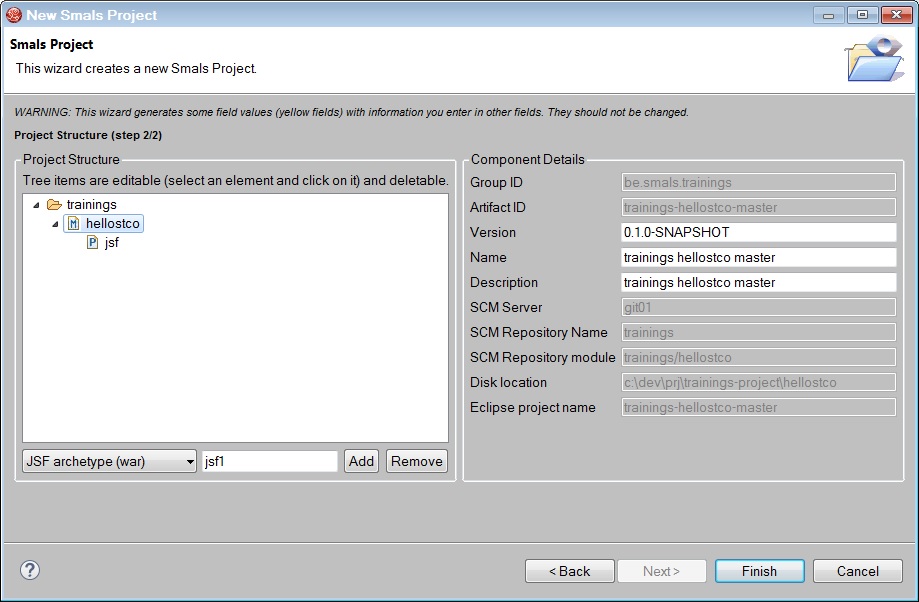
Click on Finish.
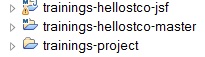
You should see these projects in JBDS.
2.3. Change context-root
In the web project, you change the contextroot in jboss-web.xml in src/main/webapp/WEB-INF.
The code is :
<context-root>trainings-hello[userId]-jsf</context-root>
You must replace with your userId.
2.4. Install maven
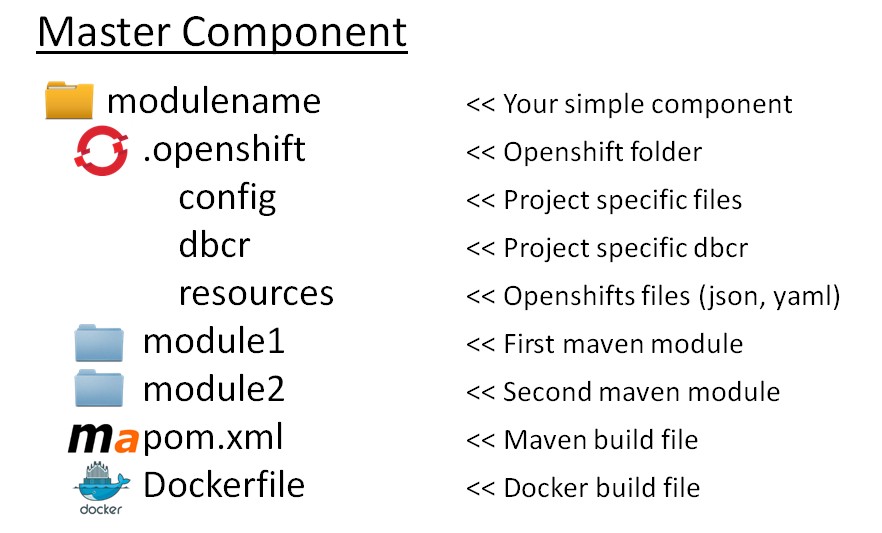
The structure of your project :
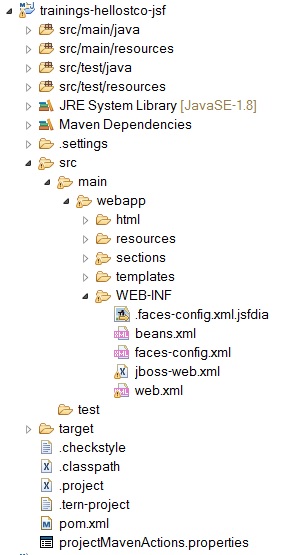
Do a install maven and the war must be in target folder.
3. Deploy local jboss
1. First of all, you have to launch the Docker@Smals toolbox (install instruction).
On your desktop, click on the icon Smals Docker.
It could take some moments to load (especially if
it’s the first time).
3.1. Start jboss
In the Docker at Smals command line, enter the following command.
EAP 6:
socsec 1 or vas 1
EAP 7:
socsec7 1
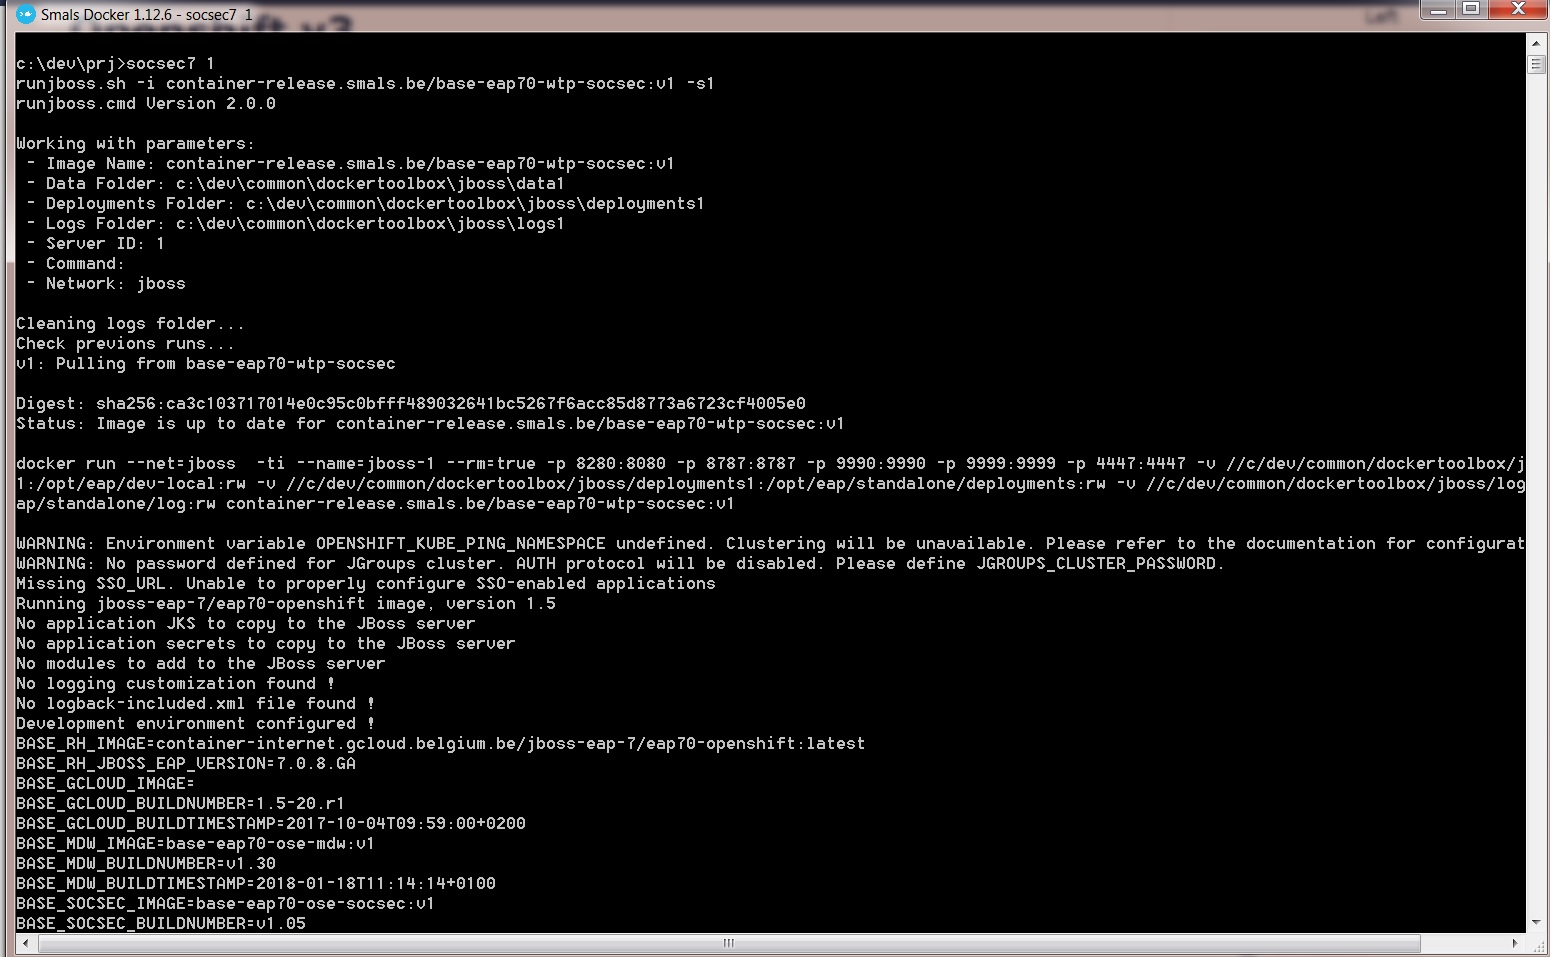
The first time, it could take some minutes to pull the image. Executing this command pulls the local JBoss image and run it.
3.2. Deploy a war
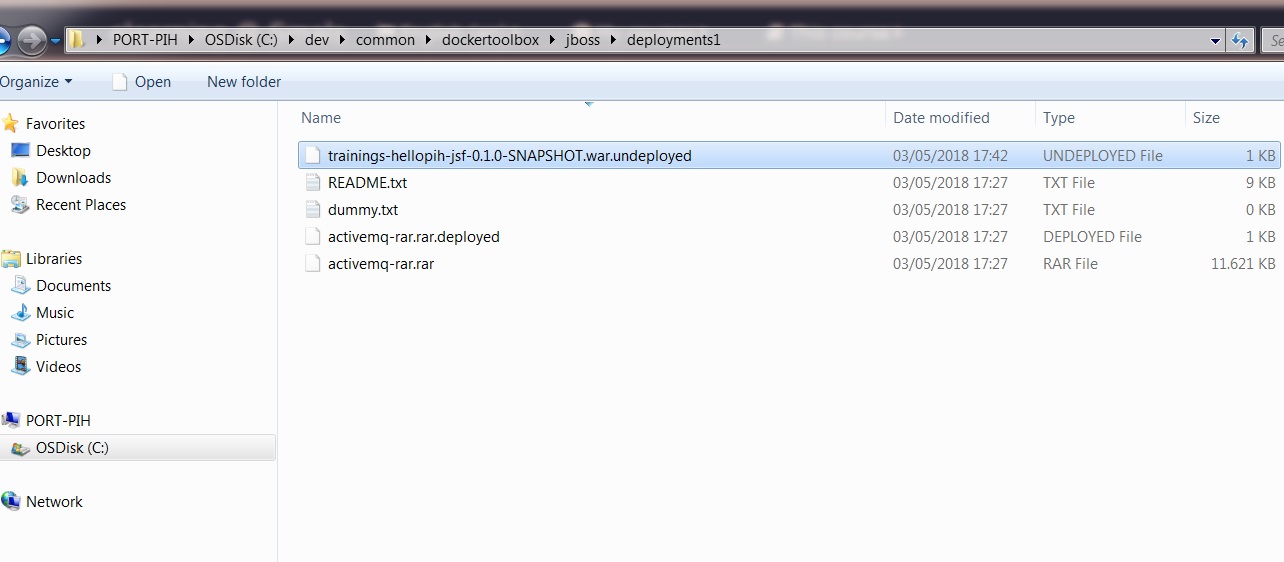
Copy the war file from the target folder of the web component into C:\dev\common\DockerToolbox\jboss\deployments1
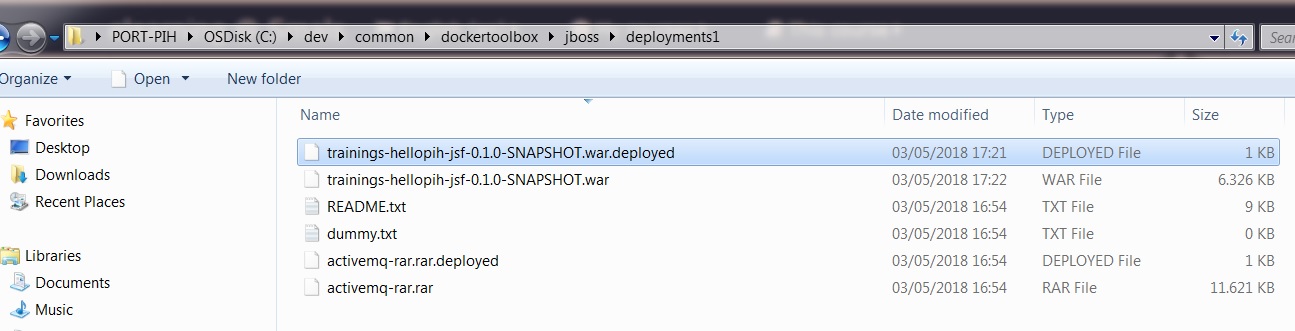
Verify that the folder in which you copied the war file contains a file with the same name as the war with the .deployed extension.
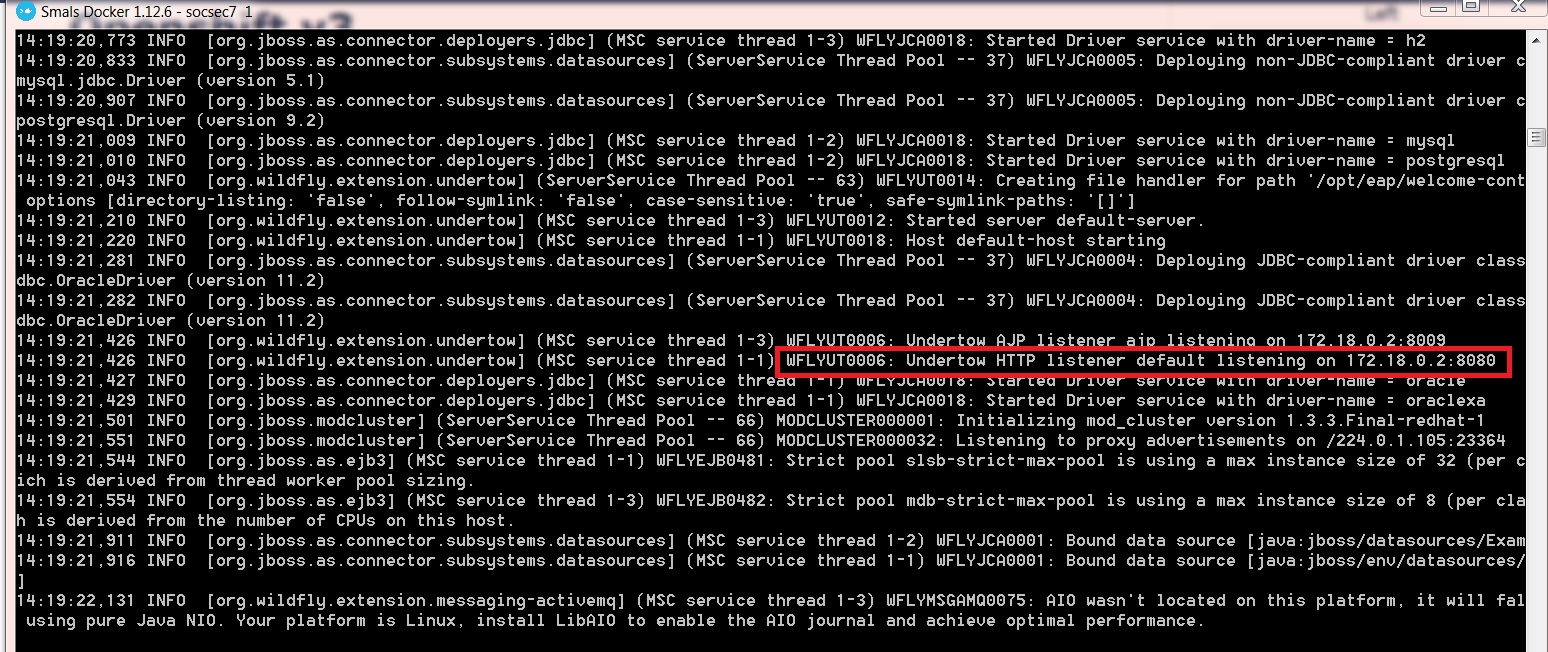
If you have an error, you could check the docker toolbox console and search for some exceptions.
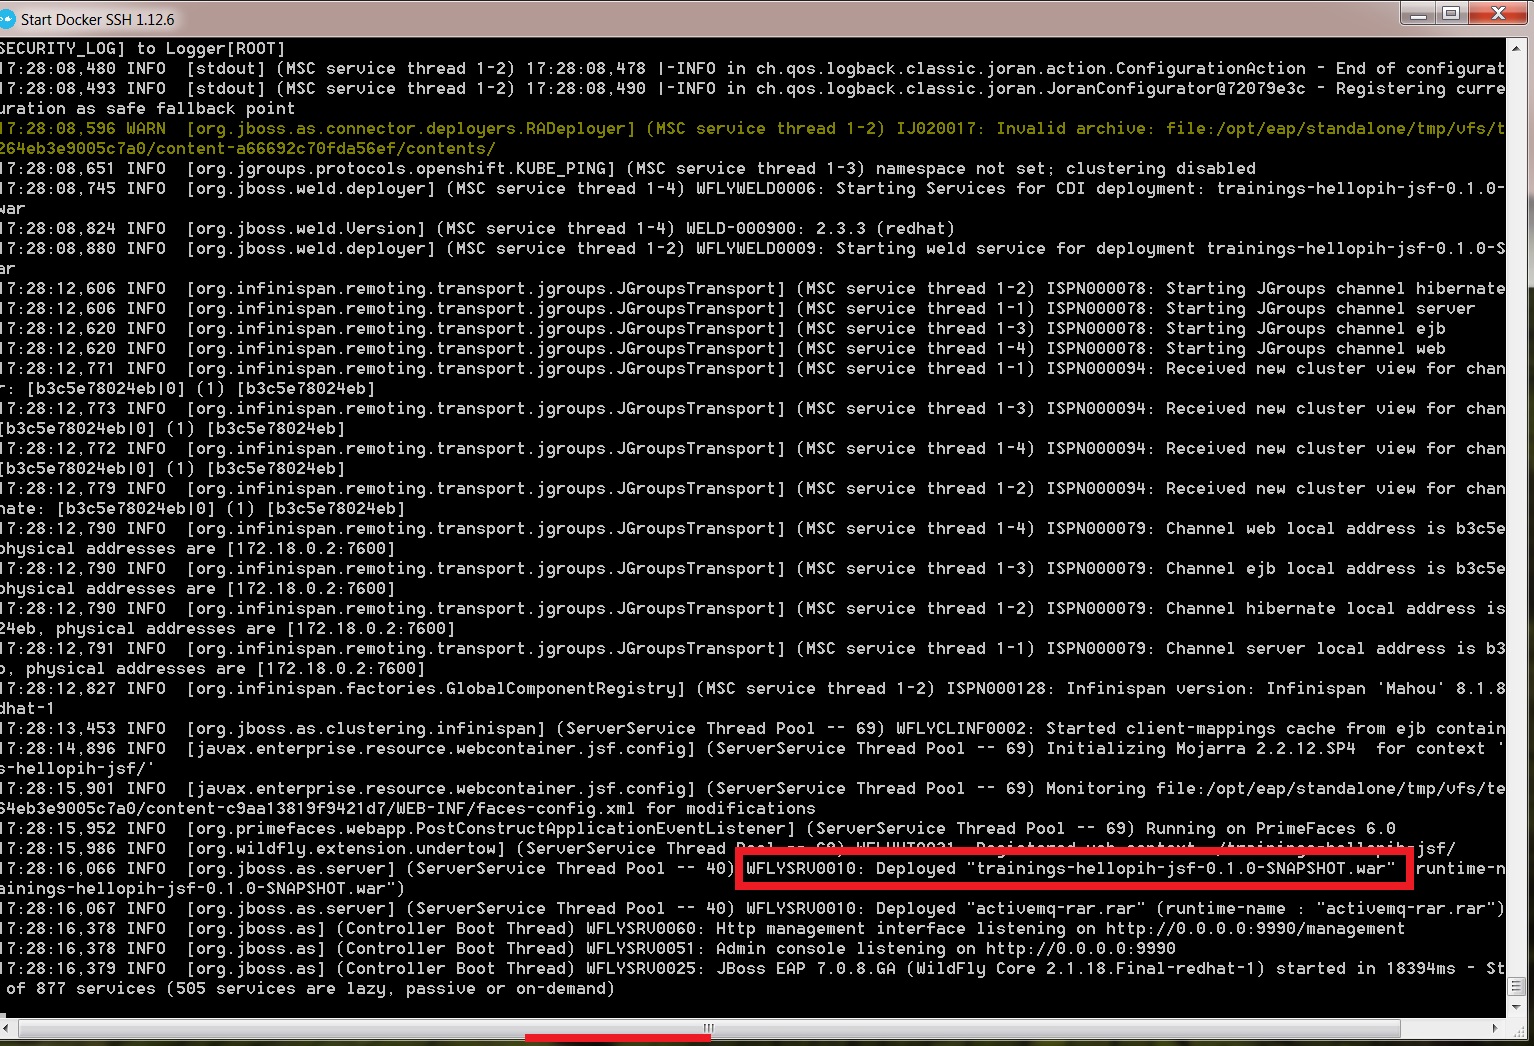
This deployment folder listens on the 8280 port.
3.3. Undeploy
To undeploy your application, you just have to remove all files from the deployment folder.
You can also consult the docker toolbox console.

4. Deploy with WTP
When you develop, it's easier to deploy using WTP. Otherwise it becomes rapidly tedious to test every minor changes. Using WTP, one can directly deploy from Eclipse and benefit from the Hot Deploy and Hot Debug features.
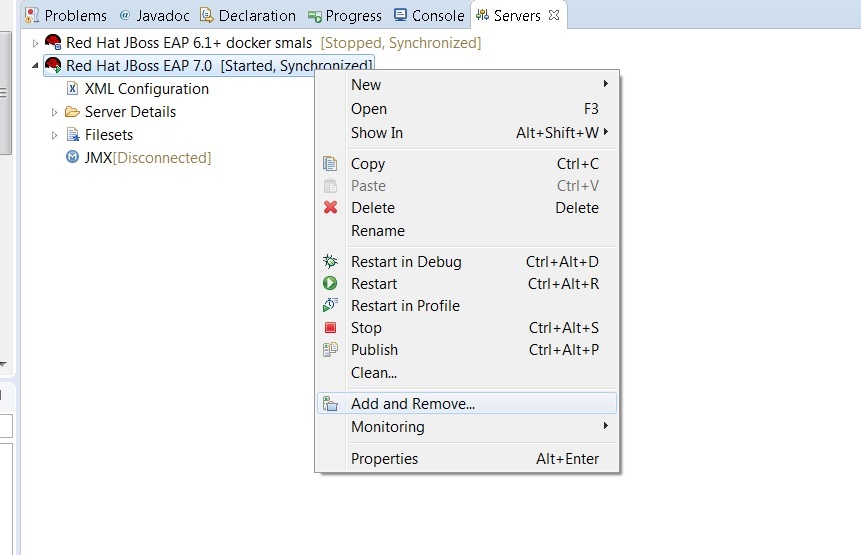
First, you must install a JBoss server in your IDE.
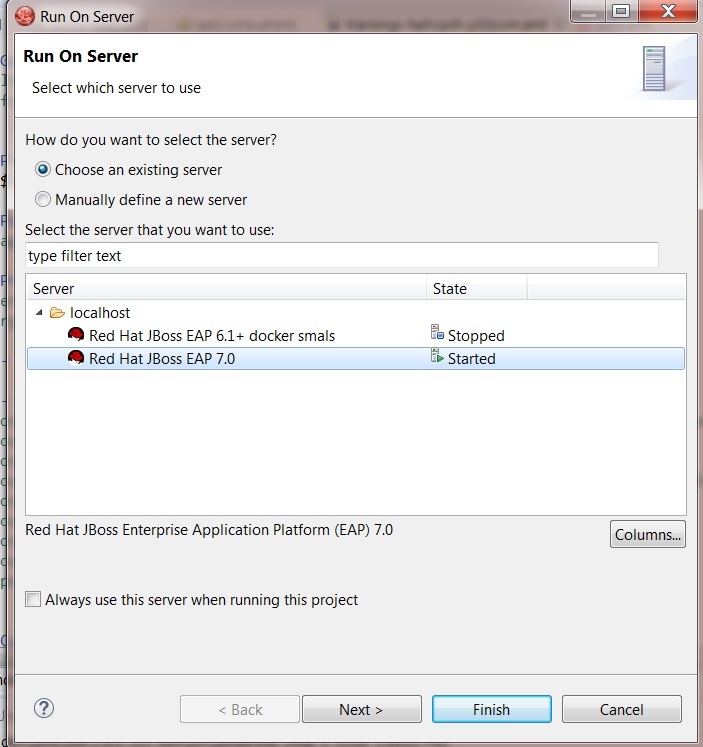
4.1. Deploy project
Two options :
1) In the server view, you can add your project.
2) Right-click on the web component and run as > run on server.
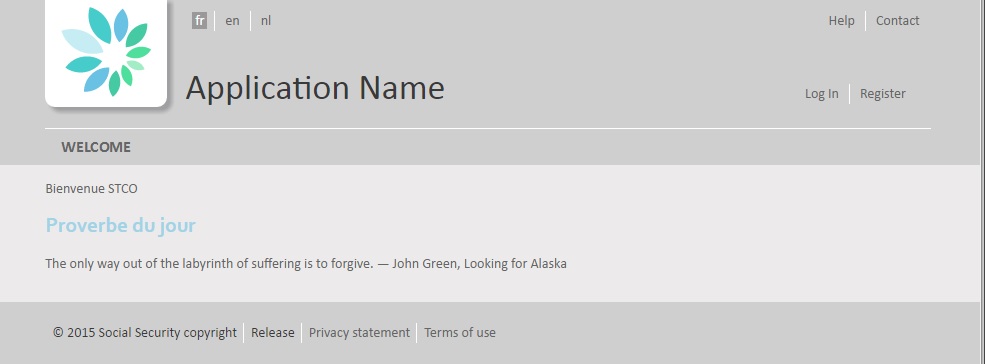
4.2. Modify a page
In the web project, in the file src/main/webapp/html/welcome.xhtml, add a message with your userId to the welcome message.
Save your changes and refresh the internal browser (F5).
5. GIT and jenkins
First, you must send an email to jdss@smals.be and ask the project in the repo trainings.
Information :
- Create GIT project : https://git01.smals.be/groups/trainings/hello+userId
- Create jenkins jobs (maven + docker not analyze and release)
- Openshift project : socsec-test-trainings
- DC name : trainings-hello + userId
- Image : trainings-hello(+userId)-web-VERSION.war
- VERSION : 0.1.0-SNAPSHOT
- Ask access socsec-test-trainings in Openshift
5.1. Share your project
Use your favorite git client git bash or your IDE
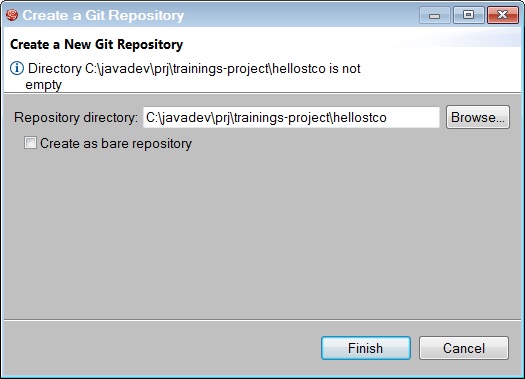
In
JBDS, in the Git perspective, click on the ![]() Create a next local Git Repository button.
Create a next local Git Repository button.
Go back in the JBoss or Java perspective, select the trainings-hellosXX-master project, right-click on it and select Team > Commit….
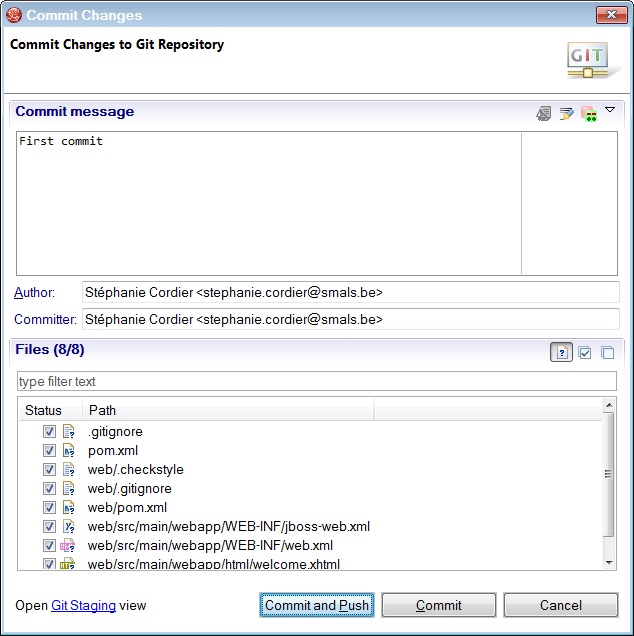
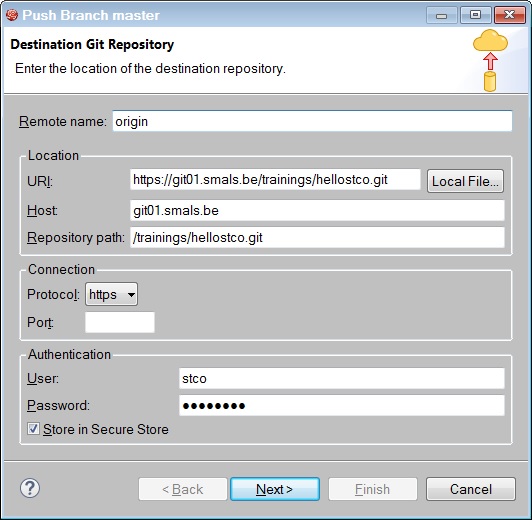
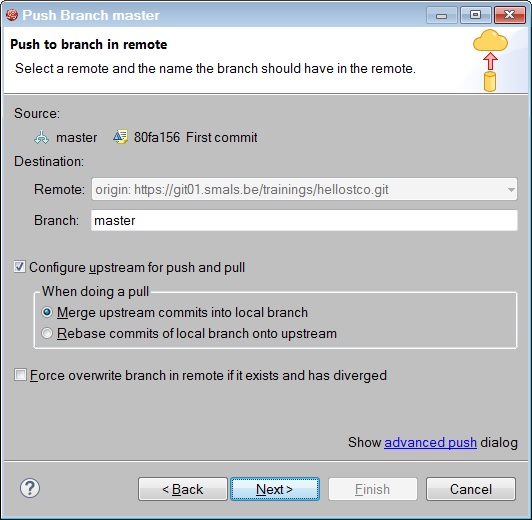
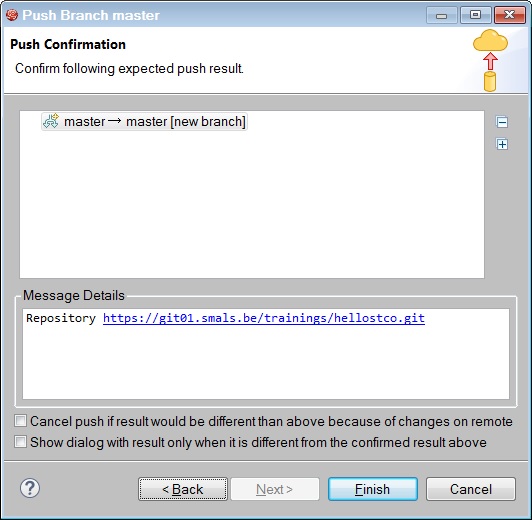
Fill in the following form and click on Commit and Push button.
Then you must configure your Destination Git Repository for the first time. The protocol is SSH. This protocol uses a public and private key.
6. Add project in Openshift
We have an application that shows one page with a hello world message.
This application is on GIT and the project builds with jenkins.
Now, we are going to deploy your application in the Openshift test.
Before, you must add configuration for docker and Openshift in your project.
6.1. Create a DockerFile
With openshift, we are going not deploy a war but a docker image.
The docker image is built by jenkins job BuildDockerSnapshot_trainings-hello10-master.
You must only add one file (Dockerfile in the root of the master project.) in your project. This file is used to define the base image that you want to use.
1) Choose your image in the docker repository. You can choose a image JBoss EAP 7 for socsec because the application will be deployed on the socsec tenant.
2) Click on the image that you have chosen
3) The url is in the README.md

Result : add a Dockerfile

Content :
FROM container-release.smals.be/base-eap70-ose-socsec:v2
6.2. Create Openshift Configuration
All interractions with openshift are done with the console or CLI. This exercise explains it with the console and jenkins.
1) Connect to the console with your scloud account. (www.scloud.be)
2) Choose socsec-test-trainings project
3) Your application is not yet in the socsec-test-trainings. You must create your application in this project. We recommend you to use the jenkins task.
- SCM_REMOTE : gitlab@git01.smals.be:trainings/hello[userId].git
- DOCKER_IMAGE_NAME : trainings-helloXX
- ARTIFACT_ID : trainings-helloXX
- ENVIRONMENTS : tst
- APPLICATION_NAME : trainings-helloXX
- DOCKER_REPO_NAME : container-snapshot.smals.be
- OPENSHIFT_PROJECT_NAME : socsec-test-trainings
- CONTEXT_ROOT : trainings-helloXX-jsf
- EXTERNAL_PORT : 8080
- INTERNAL_PORT : 8080
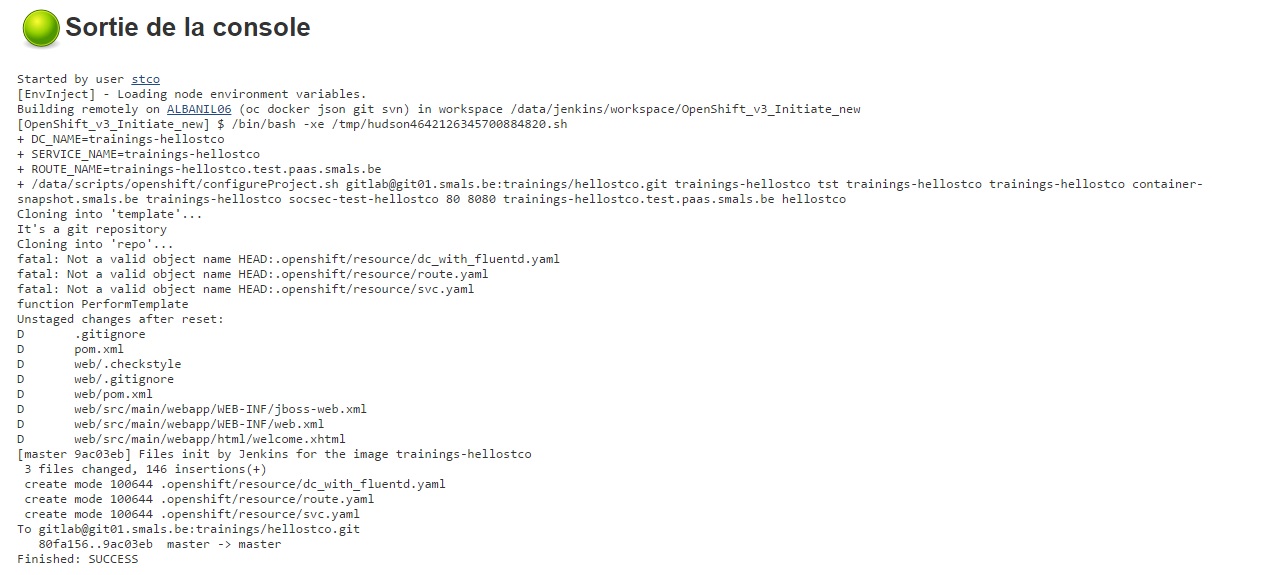
Build the job and the result should be OK.
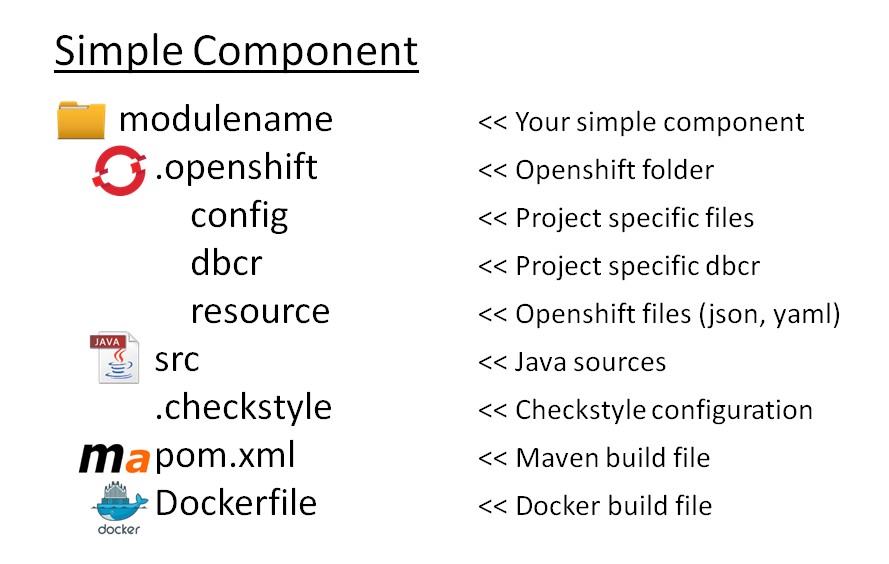
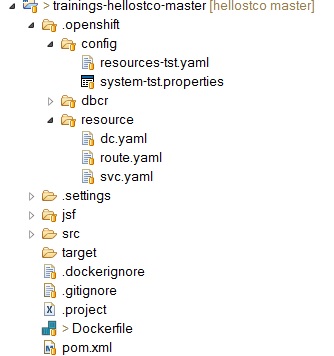
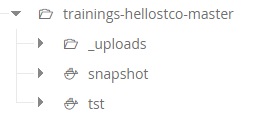
6.3. Project structure
All information for Openshift must be in the folder .openshift
The result in your project :
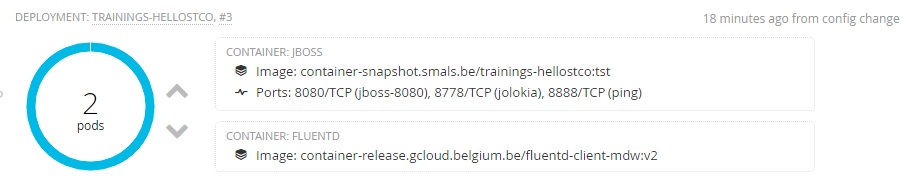
6.4. Deployment Config
The jenkins task added a dc.yaml in .openshift/resource.
This file describes the structure of the deployment of the hello application.
List of the configuration :
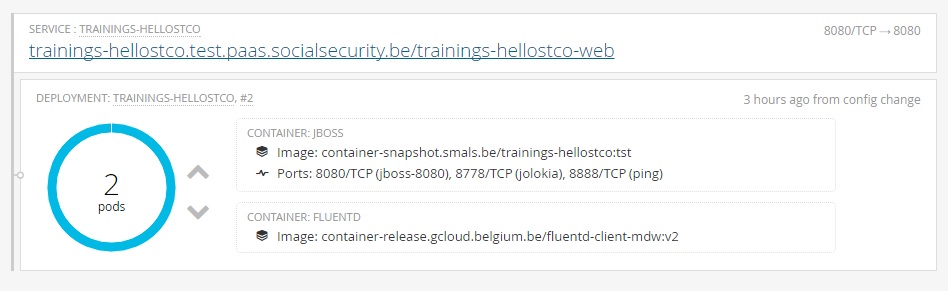
- We have 2 replicas of trainings-hello[userid] and we use the
container-snapshot.smals.be/trainings-hello[userId]:tst image.
- 2 containers : one container with your application and the other is a container for fluentId. FluentId is used to do the copy of the log. This log is centralized and backuped outside the docker image.
- The environment : tst, int, acc, sim, prod
- The definition of the secret to use by the common build
- Memory
- etc
If you do not use the jenkins task, you can use the dc template of Middelware to build your dc.yaml. You must change :
- CHANGEIT_DCNAME = trainings-hello[userId]
- CHANGEIT_APPNAME = trainings-hello[userId]
- CHANGEIT_ENVVALUE = tst
- image : container-snapshot.smals.be/trainings-hello[userId]:tst
More information on https://git.gcloud.belgium.be/openshift/template-config-files/tree/master
Here is the result in the console :
6.5. Add Service
The jenkins task added a service.yaml dc.yaml in .openshift/resource.
You can use the service template of Middelware to build your service.yaml.
This service has
- a name
- a namespace : the openshift project
- the port for the internal and the external
- a reference to the deployment config
For this exercise, I give you the content of this file. You must only change [userid].
apiVersion: v1
kind: Service
metadata:
name: trainings-hello[userId]
#Set here the project name previously created by Server Team
namespace: socsec-test-trainings
spec:
selector:
#Set here the deployment config name created in dc.yaml
deploymentconfig: trainings-hello[userId]
ports:
- nodePort: 0
#Set here the port that you want to be exposed by the service
port: 80
protocol: TCP
#Set here the port exposed by the Docker container
targetPort: 8080
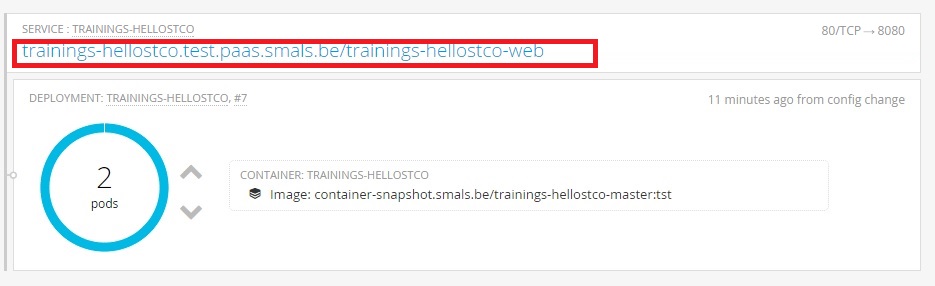
This file describe the service of your project. The project is deployed on socsec-sda-1, use the deployment config trainings-hello[userid] and the port.
Here is the result in the console :

6.6. Add Route
The jenkins task added a route.yaml dc.yaml in .openshift/resource.
You can use the route template of Middelware to build your route.yaml.
The route has :
- a name
- the url of your application
- the context root
- a reference of your service
For this exercise, I give you the content of this file. You must only change [userid].
apiVersion: v1
kind: Route
metadata:
name: trainings-hello[userId]
spec:
host: trainings-hello[userId].test.paas.socialsecurity.be
path: /trainings-hello[userid]-web
to:
kind: Service
name: trainings-hello[userId]
This file describe the route of your project. The route use the service of your application and you define the host of your application.
Here is the result in the console :
6.7. Build and deploy your application
1) Build in jenkins the task "BuildDockerSnapshot "
![]()
2) The BuildDockerSnapshot should be ok .
![]()
This task build the image and copy the result in Artifactory. the image should be available in Artifactory in the repository docker.local.snapshot.
3) The BuildDockerSnapshot call after DeployOC
![]()
4) Verify the log after the build
In the Openshift console, you should see your component.

5) Check is your application is deployed.
6) Click on the title (trainings-hellostco.test.paas.smals.be/trainings-hellostco-web), it will open a new tab with the application.